Showing posts with label tutorials. Show all posts

Monday, 5 May 2014

Get Crafty: An embroidery hoop for a special Amie


My mum is Dutch. It is something I absolutely adore about her. Not only do I think it makes her super cool, but there are various aspects of her personality that are TOTALLY Dutch. It's only really noticeable when you spend a bit of time in the Netherlands, or with another person who is from the land of giants. (I am 6'2" and feel teeny weeny over there)

Her 'Dutch-ness' presents itself in ways such as:  her love of orange trousers and lime green sandals, the response of 'yes,yes,yes' when a simple British singular 'yes' would do, her quizzical face when you use sarcasm against her, her love of cheese with Jam, her love of mayonnaise with chips.....

She is not a Grandma or Granny.... She is Dutch! Dominic and I joked about trying to get Lena to call her Opu which is their version of Nan. Mum did not laugh at this suggestion. But the thought of a 2 year old in an adopted Brighton accent shouting O-pooooooo across the playground tickled me no end. Anyway, Team Baby agreed that her name was to be Omie; a cheeky version of Oma.


Friday, 25 April 2014

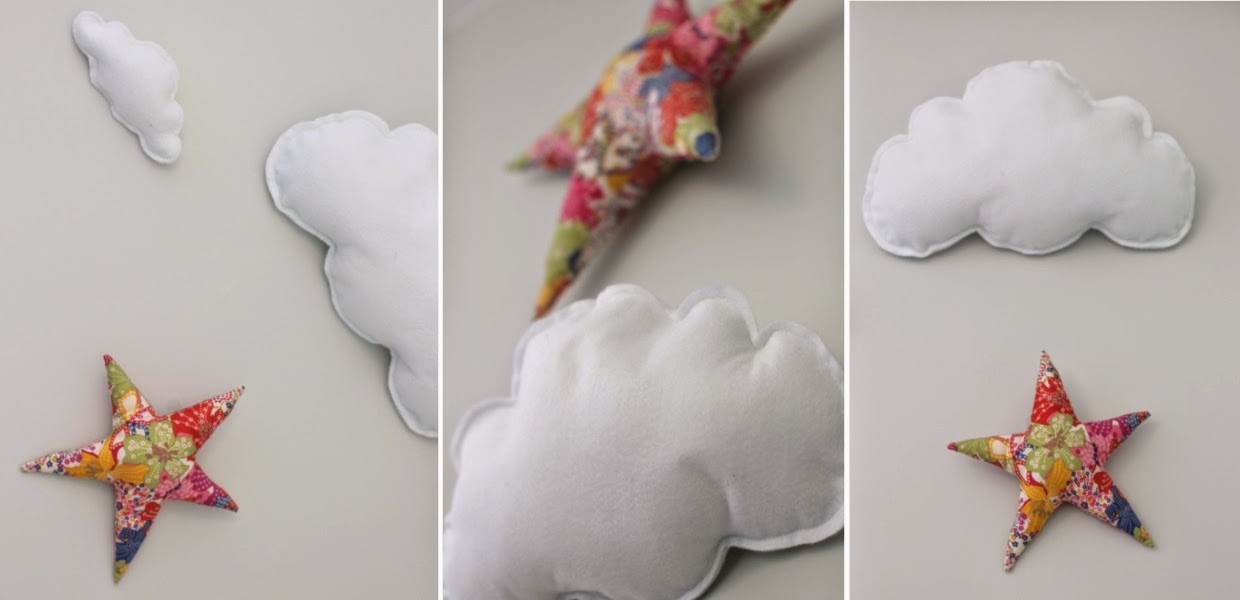
Get Crafty: Twinkle Twinkle Little Star


Lena is absolutely obsessed with stars. If she takes a late afternoon nap we are often lucky enough to keep her awake so that we can go and pick up Daddy from the train station. Before the clocks moved forward it was dark enough when we arrived back home for her to see the stars. She would point wildly at the speckled sky as her Daddy tried to recall the constellations he had learnt as a child. It doesn't matter how crazy the day might have been, to watch this made me want to wrap them both up in cotton wool, it was so cute.

With summer slowly announcing its arrival Lena doesn't get to see the stars anymore. So we have some glow in the dark ones stuck to her ceiling and then some rather fine looking fabric ones hanging on her wall.


I am more than just a little bit chuffed with these. They only took me an evening to make and now hang proudly on the wall at the head of her bed. It has been completely worth cutting into the Liberty stash to make them just to see and hear Lena's excitement every morning as she points out her very own stars and clouds.

Unfortunately I didn't photograph as I went so I don't have a tutorial for you. It's pretty easy. All I would say is that If, like me, you have completely forgotten how to draw a neat star shape go to this web page, making sure to include a seam allowance on your pattern.

Thursday, 24 April 2014

Get Crafty: A birdcage


I do adore birdcages. There's something so whimsical about them. I think if I were given free rein to decorate as I wish every room would probably have a nod to a birdcage in it. Rob Ryan bird cage wallpaper, a collaboration with Mini Moderns.... hello!!

My biggest lust for the past five years has been a Tamar Mogendorff birdcage. But since I haven't managed to win the lottery within that time, nor play it in actual fact, I am still to sit in wait.


In the meantime, I thought I would have a go at making a little version myself. It is by no means a replacement. It's purpose, instead, is to hang proudly in my home keeping the spot warm for when I do finally buy one of her superb creations.... I'm truly hoping that day will come within the next 10 years.

Tuesday, 22 April 2014

Get Crafty: cover an embroidery hoop

For years I have been too nervous to embroider. I always felt it was a craft reserved only for the upper echelons of Crafsters. I put this firmly down to the frustration I felt in the one 'home skill' class I took in Junior School that didn't involve blowing up a microwave with a Lurpak wrapper.

I just couldn't get to grips with a french knot..... nor the concept of threading the needle with lots of little thread ends. And so I was left to marvel at the work of others. That was until I learnt how to embroider a little speck of a bee. It was a small but very mighty bee, I'll have you know. Since then I absolutely adore it. Using lovely linen from Ada & Ina which makes for an inspiring base fabric and then I get giddy with all of the colour combinations of thread, types of stitches and especially the mixing in of a little scrap of fabric for a new depth.

Regardless of my ramblings, I do have a point to this post. I have made a little something for a special someone and I wanted to jazz up my hoop, so to speak. I have never been a wild fan of embroidery work  framed by plain-as-they-come hoops. I much prefer them in shadow box frames or painted hoops. But for the hopscotch piece that I have created a painted hoop just didn't seem right. But do you know what did...... A Liberty hoop, of course!

And here begins the tutorial on how to cover an embroidery hoop with Liberty fabric, or any cotton you wish. Before we begin, I would like to start with a few tips:

1. If your 19 month old daughter will not let you do anything without her involvement and you wish to photograph a tutorial as you go, do invest in better lighting than an Ikea paper lamp on your workstation.
2. Be patient.... let the glue gun heat properly.
3. Work with a scrap piece of paper next to you to dab off excess glue.
4. Embrace the gluey whispers as they come. If not, the rage will overpower you.
5. Always start with a new glue stick. It may look like you have enough left in the gun, but rest assured there will be that point when you need to add a new stick part way through the project and end up a victim of the Hot Glue Megablob..... et voila!

What you'll need
Wooden embroidery hoop - mine was 21cm in diameter
Fabric (or ribbon if you have this, ideally no bigger than 0.5" wide)
Rotary Cutter
Ruler
Cutting Mat
Glue Gun
Scrap paper

Make the fabric strip
Unless you have a stash of pretty printed ribbons you're going to need to make your own continuous fabric strip. To do this I folded a rectangle of scrap fabric. I folded selvedge edge to selvedge edge in order to give a little bit of flexibility/stretch to it, but I didn't feel the stretch of bias was necessary. I folded it again and again until I had a neat little Viennetta-like bundle.

Then using a cutting mat, rotary cutter and ruler I cut strips 0.5" wide. Take care to press firmly with the cutter so that you don't have to take repeat strokes as this can cause the edges to fray.


Then place two strip ends right sides together at a 90 degree angle. You will then need to sew diagonally across the centre of the square that is effectively created where the two fabrics meet. If you're working with Liberty this can feel a little tricky due to the delicate feel of the fabric. Once sewn, trim off the excess and press the join flat - there is no need to press the seam open. Then just keep doing this, adding the ends together until you have one long ribbon.


To cover my hoop I needed a fabric strip of just under 205cm

Glue guns at the ready  
Now warm up that glue gun... and remember that patience we talked about!
Starting at the top near the clasp smear a gooey blob on the inside of the hoop just long enough to cover three rotations worth of fabric, and then wind your strip over this. You have to be pretty snappy so the glue doesn't set, so to start with a smaller blob size is ok until you get your winding confidence up. 

Then simply keep glueing and winding until you come to the end.

I only overlapped the turns by a fraction as I suspected my ribbon length was cutting it fine. I made the overlap a little closer on sections where the seam was visible on the outer just to conceal it a little more.


Once you're at the end you just need to finish with another splodge of glue on the underside of the hoop.Then trim off any over the top fraying that's happened to your strip during handling, but not too much as I think this adds the the aesthetic, as well as any gluey whispers.


And here's a sneak peak at it on the project in question:


Monday, 21 April 2014

Get Crafty: Find that Liberty fabric

Liberty cotton. I adore it. As soon as I indulge in buying a carefully selected piece it gets anxiously washed, delicately pressed, lightly folded and then repeatedly stroked and gawped at.  Although gorgeous it is by no means cheap. Cutting into it for a project always fills me with butterflies and my hands get ever so slightly shakey as I bring the scissors towards it..... In my "interesting" head I can hear the impending strings of Jaws. Yup "interesting" is a polite word to use.
Anyway, if you are vaguely anything like me, or if you are more emotionally stable and just like Liberty I have found a gem of a blog post.  The amazing Ali from Very Berry Handmade has written a hugely informative list and review piece about where to go for all of your Liberty cotton desires; be it fat quarters, binding or metres.
I feel an over indulgent buying, washing, pressing and not forgetting stroking session coming on. Yay for me!

Friday, 11 April 2014

Get Crafty : Pom Pom wall hanging


The lovely Eleanna Kotsiku shares a fantastic tutorial on how to make a statement pom pom wall hanging. Head over to Craftstuts+ for the full step by step guide. I was lucky enough to receive a selection of pom pom makers for Christmas so I may well give this a whirl and hopefully in half the time! Although I fear it may just open the flood gates for a pom pom addiction.